Terraforming a Standalone Rancher Server on Azure
I need to quickly stand up a standalone Rancher server for testing and troubleshooting in Azure. I have seen plenty of guides and Terraform doing this in AWS. I decided that I would create one.
Creating the Terraform
First, we add our providers.
terraform {
  required_providers {
    azurerm = {
      source = "hashicorp/azurerm"
      version = "2.56.0"
    }
    tls = {
      source = "hashicorp/tls"
      version = "3.1.0"
    }
    local = {
      source = "hashicorp/local"
      version = "2.1.0"
    }
  }
}
Now we can create our resource group, get our VM image, and create our SSH key.
resource "azurerm_resource_group" "rancher" {
  name     = "rancher-rg"
  location = "East US"
}

data "azurerm_platform_image" "opensuse" {
  location  = azurerm_resource_group.rancher.location
  publisher = "SUSE"
  offer     = "openSUSE-Leap"
  sku       = "15-2"
}

resource "tls_private_key" "rancher" {
  algorithm   = "RSA"
  rsa_bits    = 4096
}

resource "local_file" "rancher_pem" {
  sensitive_content  = tls_private_key.rancher.private_key_pem
  filename           = "${path.cwd}/rancher.pem"
}

locals {
  hostname = "jprancher"
}
Next, we need to create our virtual network and subnet.
resource "azurerm_virtual_network" "rancher" {
  name                = "rancher-network"
  address_space       = ["10.0.0.0/16"]
  location            = azurerm_resource_group.rancher.location
  resource_group_name = azurerm_resource_group.rancher.name
}

resource "azurerm_subnet" "rancher" {
  name                 = "rancher"
  resource_group_name  = azurerm_resource_group.rancher.name
  virtual_network_name = azurerm_virtual_network.rancher.name
  address_prefixes     = ["10.0.2.0/24"]
}
After that, we need a public IP and network interface.
resource "azurerm_public_ip" "pip" {
  name                = "rancher-pip"
  resource_group_name = azurerm_resource_group.rancher.name
  location            = azurerm_resource_group.rancher.location
  allocation_method   = "Dynamic"
  domain_name_label   = local.hostname
}

resource "azurerm_network_interface" "rancher" {
  name                = "rancher-nic"
  location            = azurerm_resource_group.rancher.location
  resource_group_name = azurerm_resource_group.rancher.name

  ip_configuration {
    name                          = "primary"
    subnet_id                     = azurerm_subnet.rancher.id
    private_ip_address_allocation = "Dynamic"
    public_ip_address_id          = azurerm_public_ip.pip.id
  }
}
We will create a security group and associate it with the network interface we created. We will then make the individual security rules using the azurerm_network_security_rule resource.
resource "azurerm_network_security_group" "rancher" {
  name                = "rancher"
  location            = azurerm_resource_group.rancher.location
  resource_group_name = azurerm_resource_group.rancher.name
}

resource "azurerm_network_interface_security_group_association" "main" {
  network_interface_id      = azurerm_network_interface.rancher.id
  network_security_group_id = azurerm_network_security_group.rancher.id
}
Rancher has several ports that need to be open and is listed here. I like to define these as individual security group rules so they can be composed, altered, etc. Here are the ones needed from the documentation.
resource "azurerm_network_security_rule" "http" {
  name                        = "http"
  priority                    = 100
  direction                   = "Inbound"
  access                      = "Allow"
  protocol                    = "Tcp"
  source_port_range           = "*"
  destination_port_range      = "80"
  source_address_prefix       = "*"
  destination_address_prefix  = "*"
  resource_group_name         = azurerm_resource_group.rancher.name
  network_security_group_name = azurerm_network_security_group.rancher.name
}

resource "azurerm_network_security_rule" "https" {
  name                        = "https"
  priority                    = 101
  direction                   = "Inbound"
  access                      = "Allow"
  protocol                    = "Tcp"
  source_port_range           = "*"
  destination_port_range      = "443"
  source_address_prefix       = "*"
  destination_address_prefix  = "*"
  resource_group_name         = azurerm_resource_group.rancher.name
  network_security_group_name = azurerm_network_security_group.rancher.name
}

resource "azurerm_network_security_rule" "ssh_inbound" {
  name = "sshin"
  priority = 102
  direction = "Inbound"
  access = "Allow"
  protocol = "Tcp"
  source_port_range = "*"
  destination_port_range = "22"
  source_address_prefix = "*"
  destination_address_prefix = "*"
  resource_group_name = azurerm_resource_group.rancher.name
  network_security_group_name = azurerm_network_security_group.rancher.name
}

resource "azurerm_network_security_rule" "ssh_outbound" {
  name = "sshout"
  priority = 100
  direction = "Outbound"
  access = "Allow"
  protocol = "Tcp"
  source_port_range = "*"
  destination_port_range = "22"
  source_address_prefix = "*"
  destination_address_prefix = "*"
  resource_group_name = azurerm_resource_group.rancher.name
  network_security_group_name = azurerm_network_security_group.rancher.name
}

resource "azurerm_network_security_rule" "catalog" {
  name                        = "catalog"
  priority                    = 101
  direction                   = "Outbound"
  access                      = "Allow"
  protocol                    = "Tcp"
  source_port_range           = "*"
  destination_port_range      = "443"
  source_address_prefix       = "*"
  destination_address_prefix  = "*"
  resource_group_name         = azurerm_resource_group.rancher.name
  network_security_group_name = azurerm_network_security_group.rancher.name
}

resource "azurerm_network_security_rule" "dockermachine" {
  name                        = "dockermachine"
  priority                    = 102
  direction                   = "Outbound"
  access                      = "Allow"
  protocol                    = "Tcp"
  source_port_range           = "*"
  destination_port_range      = "2376"
  source_address_prefix       = "*"
  destination_address_prefix  = "*"
  resource_group_name         = azurerm_resource_group.rancher.name
  network_security_group_name = azurerm_network_security_group.rancher.name
}

resource "azurerm_network_security_rule" "kubernetesapi" {
  name                        = "kubernetesapi"
  priority                    = 103g
  direction                   = "Outbound"
  access                      = "Allow"
  protocol                    = "Tcp"
  source_port_range           = "*"
  destination_port_range      = "6443"
  source_address_prefix       = "*"
  destination_address_prefix  = "*"
  resource_group_name         = azurerm_resource_group.rancher.name
  network_security_group_name = azurerm_network_security_group.rancher.name
}
We almost have everything we need to create our Rancher server. The last item we need before we can make our server is our cloud-init script which will update our server, install Docker, and run our Rancher container. We will do it in Terraform as I did in this post. Also, notice that in the runcmd section, I am passing in the FQDN from the Azure public IP to generate a Let’s Encrypt SSL certificate. We are getting fancy.
data "template_cloudinit_config" "config" {
  gzip          = true
  base64_encode = true

  part {
    content_type = "text/cloud-config"
    content      = "package_upgrade: true"
  }

  part {
    content_type = "text/cloud-config"
    content      = "packages: ['docker']"
  }

  part {
    content_type = "text/cloud-config"
    content      = "runcmd: ['systemctl enable --now docker','docker run -d --restart=unless-stopped -p 80:80 -p 443:443 --privileged rancher/rancher:latest --acme-domain ${azurerm_public_ip.pip.fqdn}']"
  }
}
Now we can create our server setting all the configurations that we just Terraformed.
resource "azurerm_linux_virtual_machine" "rancher" {
  name                = "rancher-vm"
  resource_group_name = azurerm_resource_group.rancher.name
  location            = azurerm_resource_group.rancher.location
  size                = "Standard_A1_v2"
  admin_username      = "rancher"
  custom_data         = data.template_cloudinit_config.config.rendered
  computer_name       = local.hostname

  network_interface_ids = [
    azurerm_network_interface.rancher.id,
  ]

  admin_ssh_key {
    username   = "rancher"
    public_key = tls_private_key.rancher.public_key_openssh
  }

  os_disk {
    caching              = "ReadWrite"
    storage_account_type = "Standard_LRS"
  }

  source_image_reference {
    publisher = data.azurerm_platform_image.opensuse.publisher
    offer     = data.azurerm_platform_image.opensuse.offer
    sku       = data.azurerm_platform_image.opensuse.sku
    version   = data.azurerm_platform_image.opensuse.version
  }
}
Yay! We now have everything created so we can execute it to make our Rancher server. Let’s run terraform init and see what happens.
$ terraform init
Initializing the backend...

Initializing provider plugins...
....

Terraform has been successfully initialized!
That is an excellent sign and time for the plan.
$ terraform plan
....

Plan: 15 to add, 0 to change, 0 to destroy.
All that is left is to apply.
$ terraform apply --auto-approve

Apply complete! Resources: 16 added, 0 changed, 0 destroyed.
It worked! Oh, we don’t have our IP address or the fully qualified domain name for our VM. Let’s add both as outputs.
output "public_ip" {
  value = azurerm_linux_virtual_machine.rancher.public_ip_address
}

output "fqdn" {
  value = azurerm_public_ip.pip.fqdn
}
Now we can rerun our apply.
$ terraform apply --auto-approve

Apply complete! Resources: 0 added, 0 changed, 0 destroyed.

Outputs:

fqdn = "jprancher.eastus.cloudapp.azure.com"
public_ip = "13.82.81.74"
Great! Depending on the VM size selected, package installation and the Rancher install can take some time. After that completes, let’s connect to Rancher and set it up.
Accessing Rancher
Open a browser and go to HTTPS://<public_ip or fqdn>/. You should now be seeing this on the following screen.
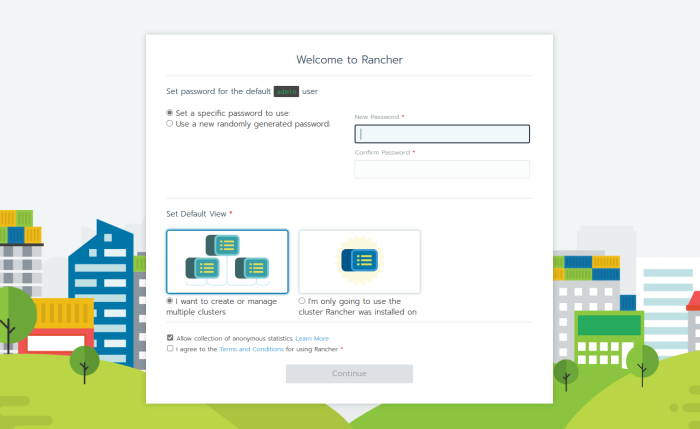
Just set a new password, and you now have Rancher up and running.
Conclusion
Thanks for coming along with me on this journey. I will explore those approaches in a future post. If you get stuck or need any assistance, please reach out to me on social media or GitHub.
Thanks for reading,
Jamie
If you enjoy the content, then consider buying me a coffee.