SQL Server on QNAP NAS
SQL Server on QNAP NAS
I run an Intel NUC model NUC7PJYH as my desktop development environment using some Linux distro as my OS. I have been doing some tinkering using SQL Server on Linux, and by the time I spin up docker and the SQL Server container, it starts taking up some resources on my little NUC that I just don’t want to give up. I have a QNAP NAS sitting next to me that has an Intel processor and can run QNAP Container Station. I don’t use that NAS for much other than photos and some backups, so I am going to put it to work running a SQL Server on Linux container. Here is how I accomplished getting it to run.
Login into your QNAP and start-up Container Station by clicking on the icon. If you don’t have it installed you can launch the App Center and search for it.
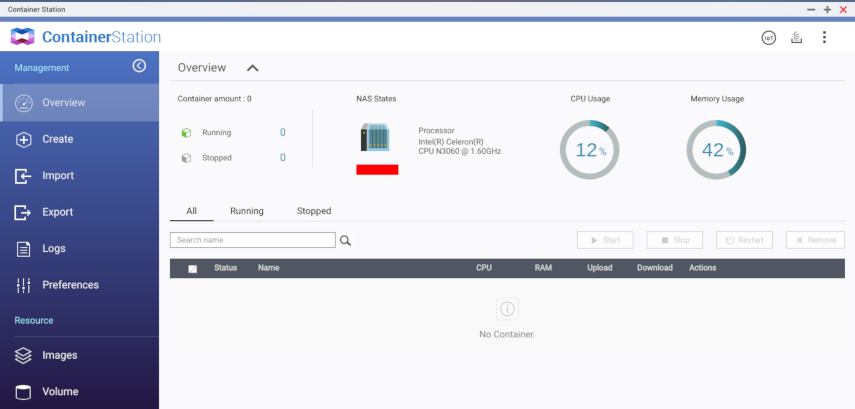
Here is what it the main container station screen looks like.
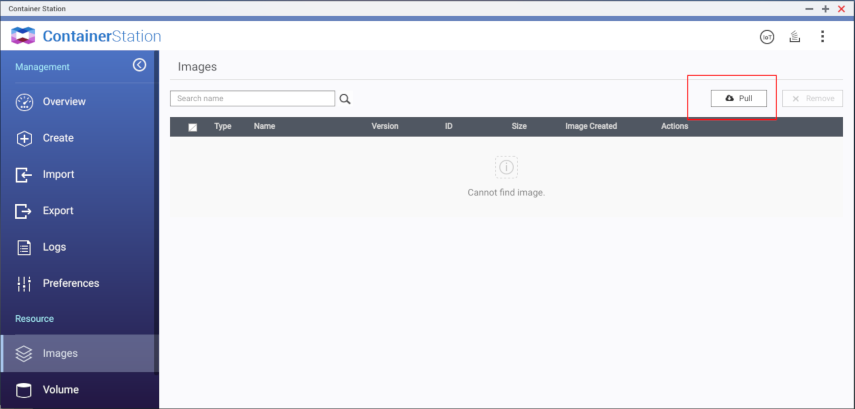
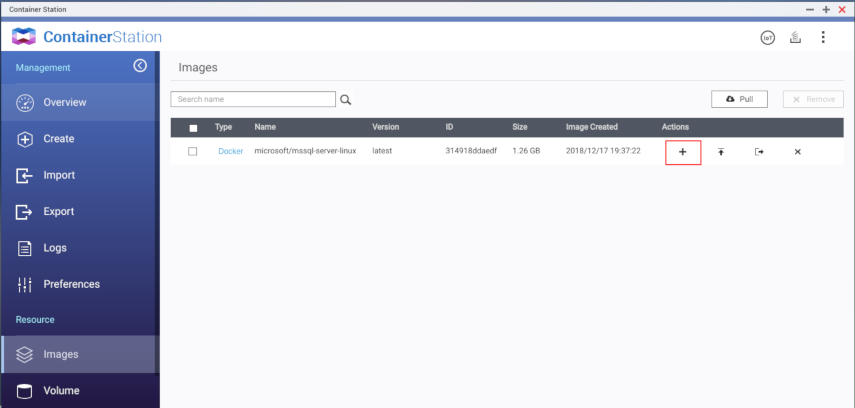
Now we need to go pull our SQL Server image from DockerHub. We do that by opening Resource –> Images.

You will notice that there is a button in the upper right-hand side called Pull, click it.
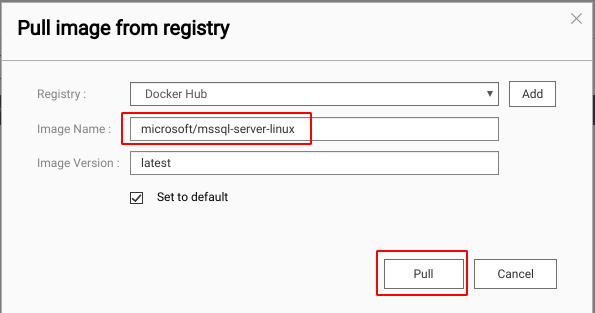
It will open a form that allows you to select the registry, image name, and the image version. We can leave the defaults, but we will need to put microsoft/mssql-server-linux in the image name. Then click pull.
Once the pull finishes, the image should show up in the image list.

Now we can create our container by clicking on the plus icon in the Actions section.
It will open the Create Container form, we are going to adjust the CPU limit and the Memory Limit, I set mine to 25% CPU and 2GB of RAM.
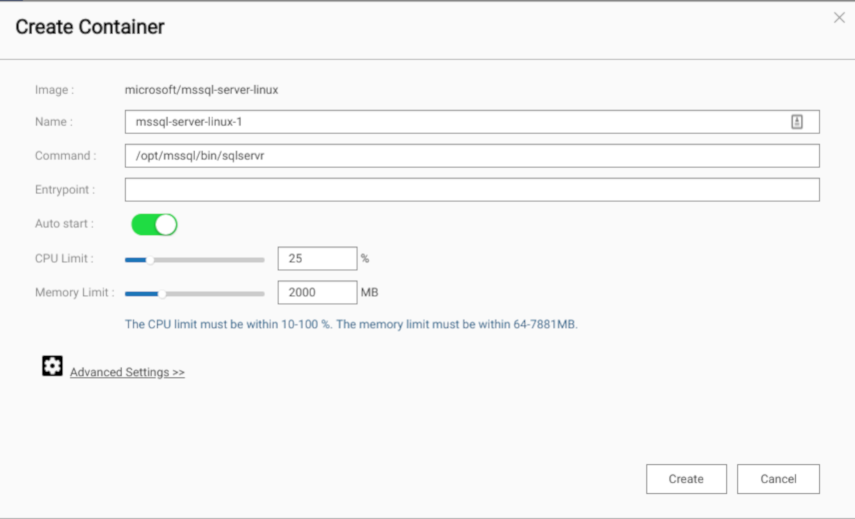
Now we need to click on Advanced Settings at the bottom of the screen.
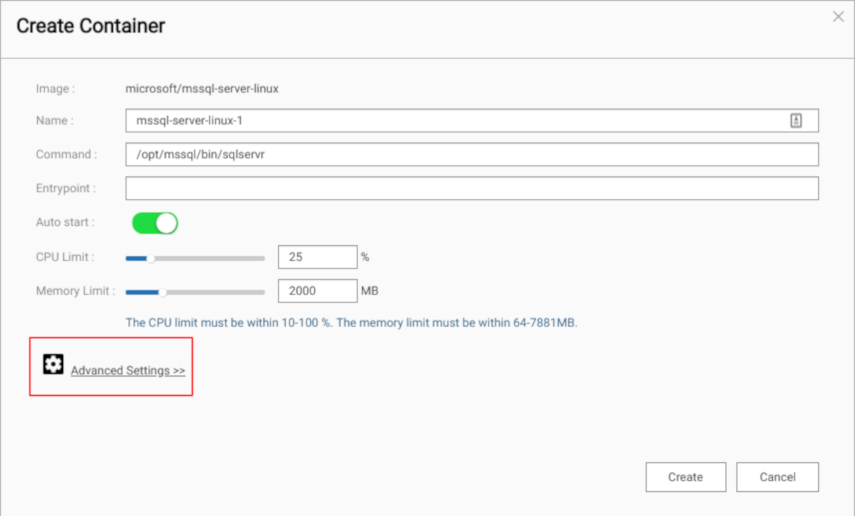
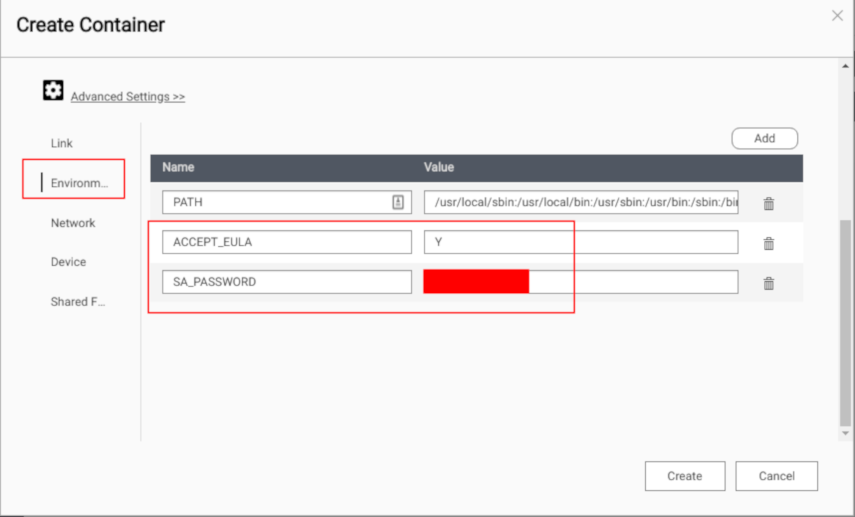
Once that is open, click on Environment, and we are going to add the environment variables for the password and the EULA. You can set your version here, but the default is Developer Edition which is what I want to use.
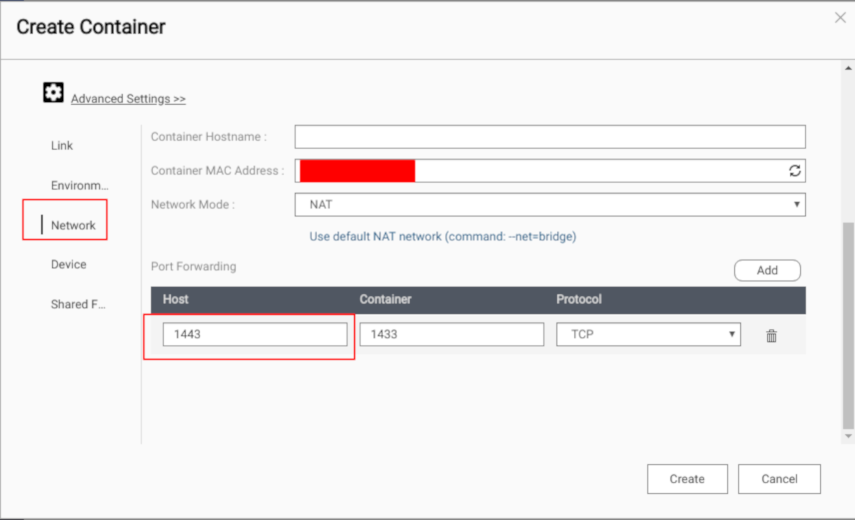
The last thing that needs to be completed before the container is created is to set the port forwarding. Go to the network section and set the port, I am going to use 1433 since my NAS is not exposed externally on my network.
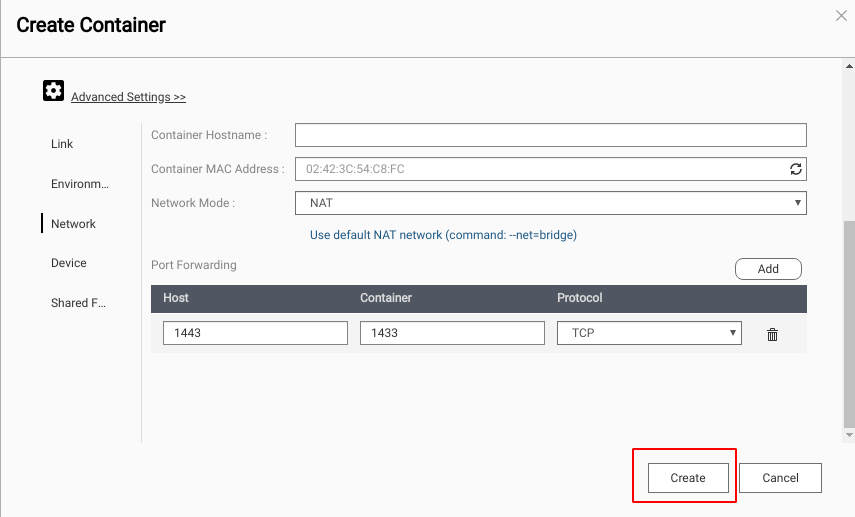
Now we can click on the Create button.
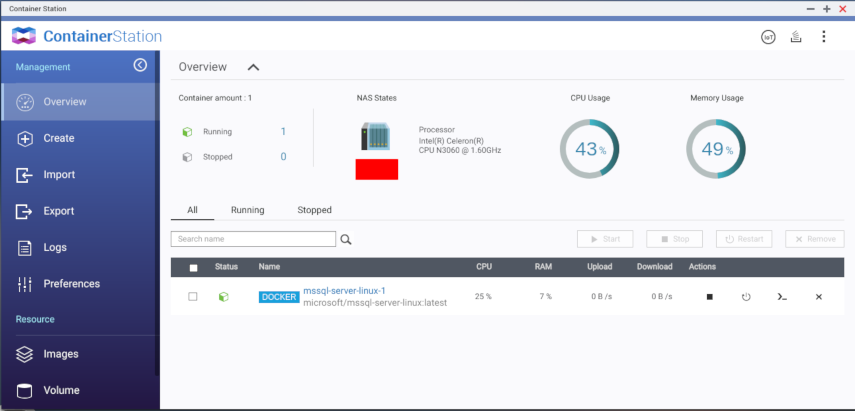
Once that is complete, it was quick for me, we can go back to the Overview screen and see that our container is running.
The last step is to connect to it using your favorite tool, I will be using Azure Data Studio. Don’t forget to set the port to the port that you used, if you are following along with me that would be 1443.
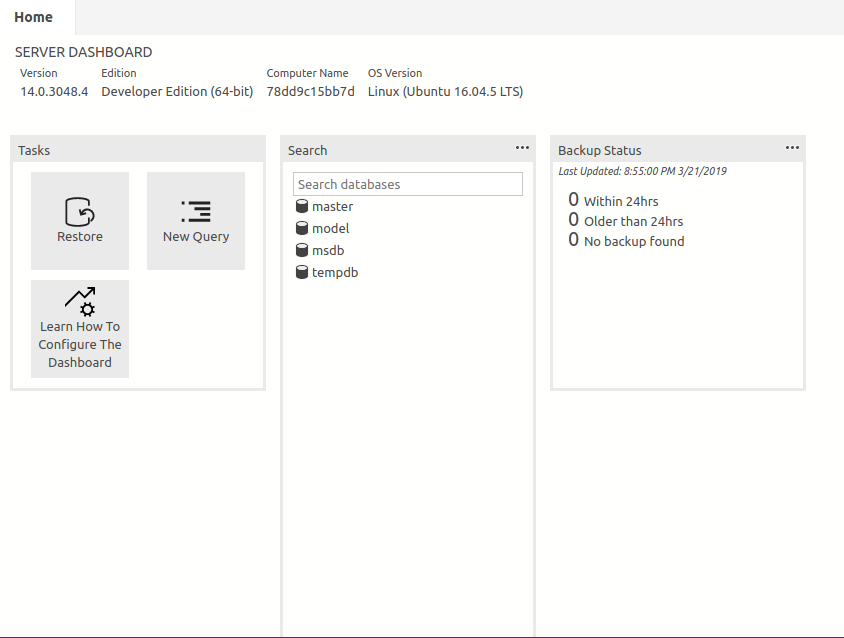
Awesome, it worked! Keep in mind that if you remove the container, the data will be removed too. However, the data stored should survive restarts of the system. This is for development purposes, so if you want to ensure that data is persisted, you can always mount a volume from your NAS to the container as outlined in this MS documentation.
I have a few more interesting uses to maximize the use of this NAS.
Thanks for reading,
Jamie
If you enjoy the content, then consider buying me a coffee.