SQL Server on Linux on Kubernetes: Part 1
In this post, I am going to walk you through a basic deployment of SQL Server on Linux to Kubernetes. We will create two Kubernetes objects, a Pod and a Service to expose our SQL Server. Once it is running on our cluster, we will connect to it using Azure Data Studio. I am using Ubuntu 18.04 with MicroK8s as my Kubernetes cluster. Please read Exploring Kubernetes with MicroK8s and configure your MicroK8s as outlined in it. Note that this will not have persistent storage or proper secret management, and those will be something we will add in future posts.
Creating your Kubernetes Manifest
Kubernetes uses YAML to define objects, and those are placed in a file called a manifest. We are going to place multiple objects in a single manifest that creates both of our objects, the Pod and Service.
First, create a manifest called sql-server.yaml.
$ touch sql-server.yaml
Now open that in your favorite text editor, and let’s create our Pod.
apiVersion: v1
kind: Pod
metadata:
  labels:
    run: mydb
  name: mydb
spec:
  containers:
  - image: mcr.microsoft.com/mssql/server
    name: mydb
We are given it the name mydb, and we are using the SQL Server container provided by Microsoft. If you read the docs for it, you will know that we need to define some environment variables to define product, password, and to accept the EULA. In addition to variables, we need to specify our port. Here are those values added.
apiVersion: v1
kind: Pod
metadata:
  labels:
    run: mydb
  name: mydb
spec:
  containers:
  - image: mcr.microsoft.com/mssql/server
    name: mydb
    env:
    - name: ACCEPT_EULA
      value: "Y"
    - name: SA_PASSWORD
      value: TestingPassword1
    - name: MSSQL_PID
      value: Developer
    ports:
    - containerPort: 1433
      name: mydb
Great, we now have an essential Pod defined. Let’s now create a Service that will expose our database from our cluster. We will be exposing it as a NodePort on port 31433.
Let’s define what our service will look like.
apiVersion: v1
kind: Service
metadata:
   name: mydb
spec:
  type: NodePort
  ports:
  - port: 1433
    nodePort: 31433
  selector:
    run: mydb
We named our service mydb and defined the type as NodePort. We then specified that the port we will be listening to internally is 1433 and that our nodePort will be 31433. Finally, we needed to define a selector to tell our service, which pod it needs to be associated with. Now we can add this to our Pod definition, make sure to separate those two objects with three hyphens.
Here is it all together.
apiVersion: v1
kind: Pod
metadata:
  labels:
    run: mydb
  name: mydb
spec:
  containers:
  - image: mcr.microsoft.com/mssql/server
    name: mydb
    env:
    - name: ACCEPT_EULA
      value: "Y"
    - name: SA_PASSWORD
      value: TestingPassword1
    - name: MSSQL_PID
      value: Developer
    ports:
    - containerPort: 1433
      name: mydb
---
apiVersion: v1
kind: Service
metadata:
   name: mydb
spec:
  type: NodePort
  ports:
  - port: 1433
    nodePort: 31433
  selector:
    run: mydb
That’s it, now we can create our resources.
Executing our Kubernetes Manifest
We are now ready to create our SQL Server and Service. Let’s check our cluster to see what pods we have defined.
$ microk8s.kubectl get pods
No resources found in default namespace.
I have no pods created in the default namespace in my MicroK8s cluster, and since the command succeeded, we know it is running.
Let’s check for services too.
$ microk8s.kubectl get svc
NAME         TYPE        CLUSTER-IP     EXTERNAL-IP   PORT(S)   AGE
kubernetes   ClusterIP   10.152.183.1   <none>        443/TCP   28d
I have the Kubernetes service running, which is expected. Let’s create our SQL Server and Service by running the apply command.
$ microk8s.kubectl apply -f sql-server.yaml
pod/mydb created
service/mydb created
Now let’s check out our new shiny things.
$ microk8s.kubectl get pods
NAME   READY   STATUS    RESTARTS   AGE
mydb   1/1     Running   0          40s
$ microk8s.kubectl get svc
NAME         TYPE        CLUSTER-IP      EXTERNAL-IP   PORT(S)          AGE
kubernetes   ClusterIP   10.152.183.1    <none>        443/TCP          28d
mydb         NodePort    10.152.183.16   <none>        1433:31433/TCP   80s
Great! Our SQL Server pod and service are both running on our cluster. Let’s test it out.
Connecting to our SQL Server with Azure Data Studio
Let’s fire up Azure Data Studio and see if we can connect to it. If you don’t have Azure Data Studio installed, there is a snap that is available that you can install it with the following commands.
$ wget https://github.com/microsoft/azuredatastudio/releases/download/1.14.1/azuredatastudio-linux-1.14.1.deb
$ sudo dpkg -i azuredatastudio-linux-1.14.1.deb
With that out of the way, let’s see if we can connect. Create a new connection and enter the following info. If you changed your SA password, then enter the correct one. Our server name will be 127.0.0.1 to represent our localhost since that is the server running our cluster. We will be logging in as sa so enter that as the username.
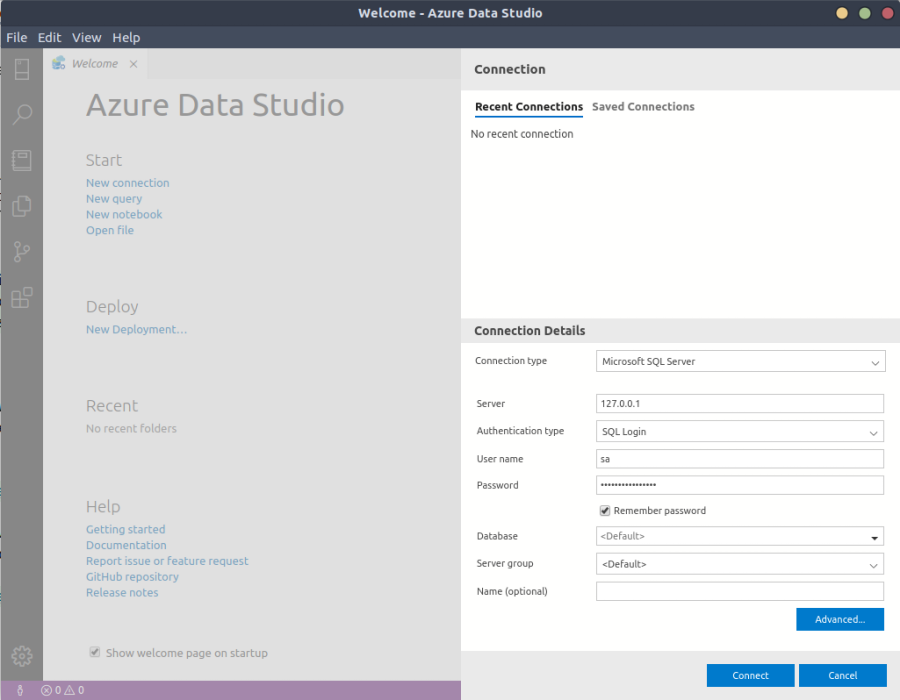
Now click on Advanced to define the port we are using, which is 31433. That setting can be found under the General section. Now click OK and then Connect.

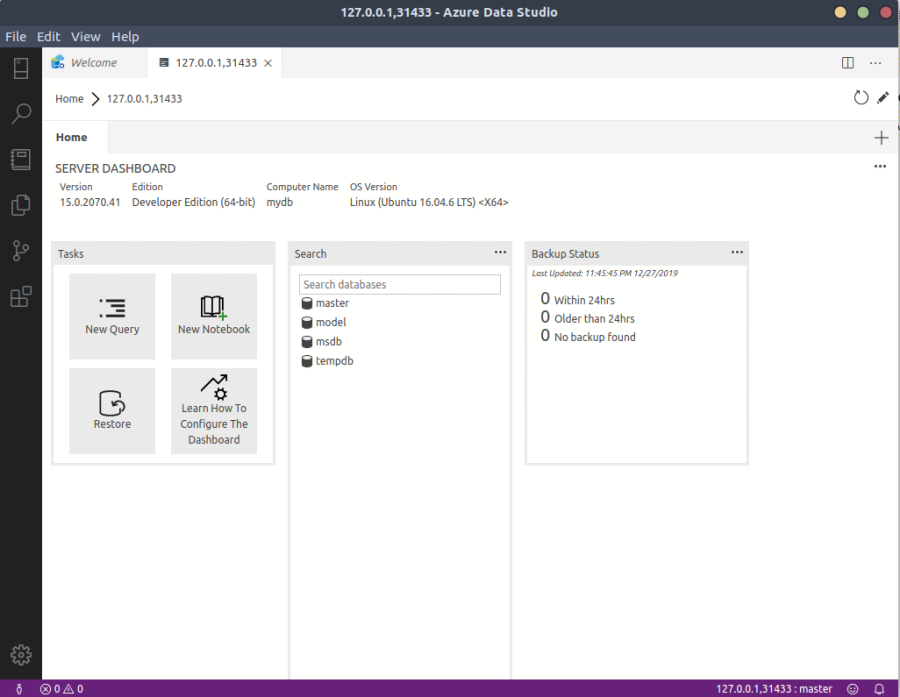
You should now see the master database.
Next Post
Now that we have SQL Server for Linux running on a Kubernetes cluster, we can start exploring additional concepts like adding persistent storage, making our SA password a secret, and a few more advanced scenarios.
Thanks for reading, and I hope you enjoyed it.
Jamie
If you enjoy the content, then consider buying me a coffee.