openSUSE: The Perfect KVM Setup
I have been using openSUSE Tumbleweed as my daily driver for a year and as the operating system for work for the last seven months. As far as my homelab goes, I have been bouncing around to different options, usually some form of Debian derivative, including running a Proxmox setup for running virtual machines. Along with running VMs for personal things, I tend to run many VMs for work. Some of those VMs run in Proxmox, others I leverage Vagrant and KVM on my desktop for creating quick environments for testing code changes locally. This setup has served me well, and it’s time to evolve the setup for how I genuinely want to work. Proxmox is currently the weak link based on several items. The first issue is that DHCP for the Proxmox host has broken again, and I can’t seem to keep it working, meaning that I have to address my Proxmox host by IP address. The second issue is the GUI focus, which prevents me from really focusing on automation; instead, I have been relying on cloning VM templates in the GUI instead of concentrating on Terraform. The final issue is that it’s the last primary Debian-based system that I am managing.
All of these issues are minor overall, and I could definately keep using the setup. I am constantly trying to improve my workflow and environment, so I wanted to try something different in parallel to see how it works. I have been so impressed with how easy setting up KVM on openSUSE that I set up a KVM server using an openSUSE Tumbleweed server install. Then I started creating and managing my VMs using the Teraform Libvirt provider to see how it felt. I have some posts planned regarding that topic, and today I want to stay focused on why I chose openSUSE, specifically openSUSE Tumbleweed, and how you can configure it.
Why openSUSE?
I chose openSUSE to be my KVM host for two significant reasons; and the first is that it uses wicked for networking, and the second is that when you install KVM through the YaST Virtualization tools, it offers to create a bridged network for you. With the bridged networking, my VMs can leverage my network DNS and DHCP to address my VMs by their hostname. It seems like such a minor annoyance. For me, it makes all the difference. There are other excellent features, like how YaST allows you to configure user groups and firewall zones. This feature works the same on both Leap and Tumbleweed.
Why Tumbleweed?
The primary reason is that I have been using Tumbleweed daily for almost a year, and in that time, I haven’t had a single issue from an update. It has been that solid that running it as part of my homelab seemed like no big deal. The other primary reason is that it has the newest stuff to have the best hardware support and a lot of kernel improvements.
Installation using YaST
Setting up an openSUSE install to run KVM is simple using YaST. You can launch the YaST GUI by searching for YaST in your menu or the YaST TUI, text user interface, from the CLI, like you would need to do on a server. The examples below are the YaST TUI. However, the GUI has a similar layout.
sudo yast
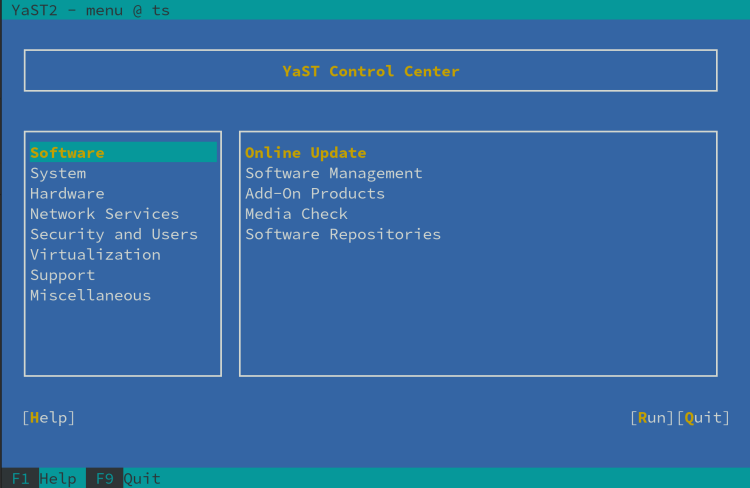
Once that is launched, you need to find the Virtualization section.
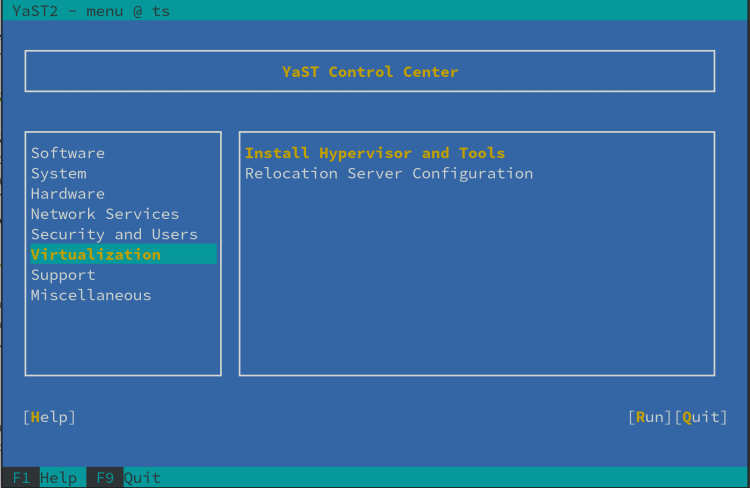
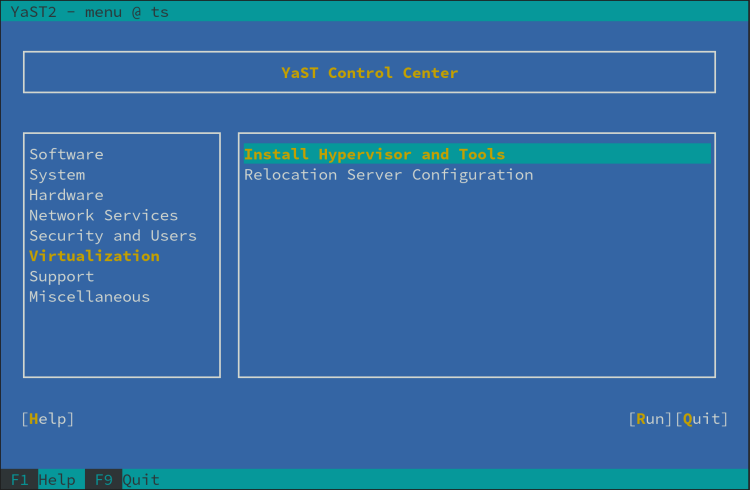
Now, arrow over and select Install Hypervisor and Tools, then press enter.
Now you can select KVM Server and KVM Tools on this menu and accept.

The installation will begin. There will be a few prompts about graphical tools, and the other will come near the end when it asks if you want to configure a bridged network. I highly recommend you say yes to that question. Once finished, you will have a working KVM server to connect to using a tool like Virt Manager to create VMs.
Wrapping Up
I have been experimenting with this setup for about a week, and right now, it seems like this could quickly become my primary configuration. I have a few more scenarios that I want to test out and try to use as part of my workflow before I fully commit. I have additional follow-up posts demonstrating how I have been using it.
I hope you found something helpful in this post.
Thanks for reading,
Jamie
If you enjoy the content, then consider buying me a coffee.