Hudson Bay Start for Projects
Hudson Bay Start for Projects
The Hudson Bay Trading Company had this practice called the Hudson Bay Start. This ensured that the trappers had the correct equipment before they entered the wilderness. I am a big fan of this approach to software development, I have worked on too many projects that didn’t realize that a firewall rule was needed, or that there wasn’t enough space on the existing VM cluster and that a new server needed ordered. These types of issues caused delays of weeks and in some cases months, if after creating the new project the team went through the exercise of trying to deploy the brand new application, a lot of these issues would have been discovered early enough in the project to either be corrected by go-live or to at least change expectations from the business.
With all of that said, I am going to walk you through what I do with any new project that I start, acknowledging that requirements will change, but it will make it easier to respond to that change.
I will be using Visual Studio and VSCode.
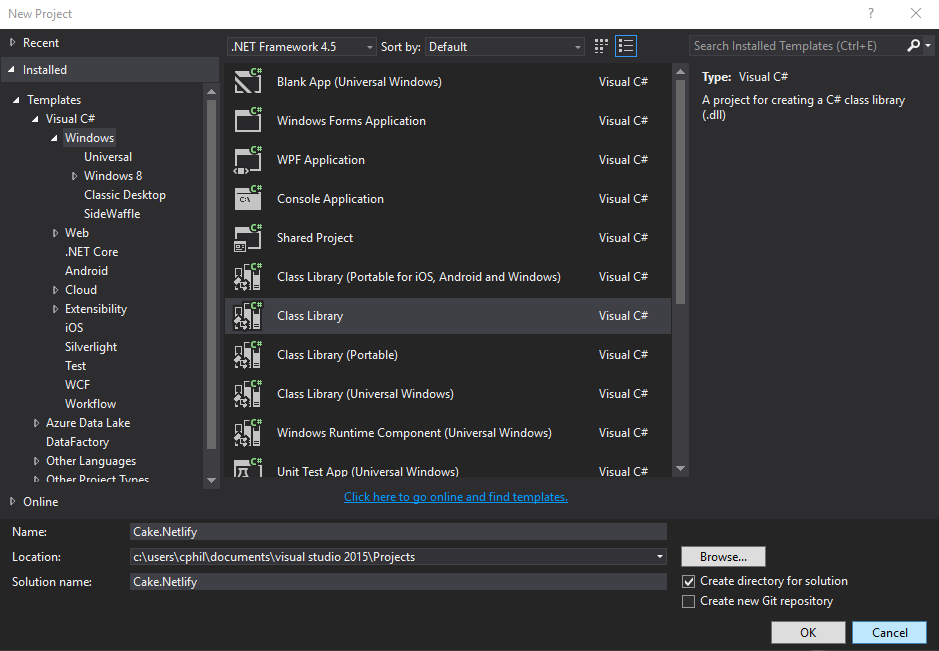
1. Create a new project
The structure of your project
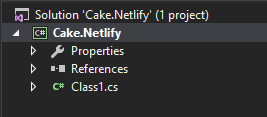
As you can see this is a the default project structure created by Visual Studio.
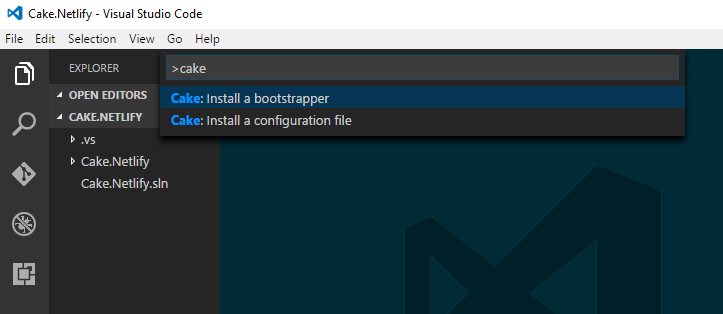
2. Install the Cake Bootstrapper
The Cake extension for VSCode makes this an easy job.
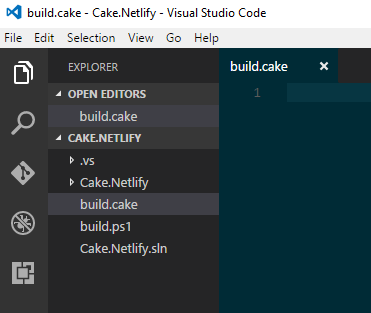
And here it is in the file system.

3. Create your Cake file
Now we just need to create a Cake file. To do this create a new file in the same location as your build.ps1 bootstrapper called build.cake.
4. Create your build steps
Now we just need to create the logic to build the application. I like to organize my Cake files so it is obvious to everyone on the team where items can go. As your build gets more complicated, you may need to break it up into extra files to it is easier to follow. Also notice that I try to put all directories and files that are needed across multiple tasks in the Preparation section as it makes it easier to change as you need. Lastly you will notice a Run-Unit-Tests task that is empty, I like putting this in there as a way of acknowledging that unit tests will be created as part of the project and all that is needed is adding the tool and the path for a team to start using it.
//////////////////////////////////////////////////////////////////////
// ADDINS
/////////////////////////////////////////////////////////////////////

// Place holder for now

//////////////////////////////////////////////////////////////////////
// ARGUMENTS
//////////////////////////////////////////////////////////////////////

var target = Argument("target", "Default");
var configuration = Argument("configuration", "Release");

//////////////////////////////////////////////////////////////////////
// PREPARATION
//////////////////////////////////////////////////////////////////////

// Define directories.
var buildDir = Directory("./Cake.Netlify/bin") + Directory(configuration);
var solution = "./Cake.Netlify.sln";

//////////////////////////////////////////////////////////////////////
// TASKS
//////////////////////////////////////////////////////////////////////

Task("Clean")
    .Does(() => {
        CleanDirectory(buildDir);
});

Task("Restore-NuGet-Packages")
    .IsDependentOn("Clean")
    .Does(() => {
        NuGetRestore(solution);
});

Task("Build")
    .IsDependentOn("Restore-NuGet-Packages")
    .Does(() => {
      MSBuild(solution, settings =>
        settings.SetConfiguration(configuration));
});

Task("Run-Unit-Tests")
    .IsDependentOn("Build")
    .Does(() => {
});

//////////////////////////////////////////////////////////////////////
// TASK TARGETS
//////////////////////////////////////////////////////////////////////

Task("Default")
    .IsDependentOn("Run-Unit-Tests");

//////////////////////////////////////////////////////////////////////
// EXECUTION
//////////////////////////////////////////////////////////////////////

RunTarget(target);
5. Continuous Integration Server
The last step is to go to your teams favorite CI server, create a project, and start executing your cake file.
Next steps
I hope others find this basic premise helpful. It has allowed our team to be successful and not be stressed when it comes time to deploy, because we have been building and deploying from day one. The next steps would be to determine how you want to deploy, for a class library project like the one above that would be to NuGet more than likely for us. In that case, all you need to do is to add the appropriate packaging steps and then make sure it will deploy.
Here is an example, that creates a NuGet package and then pushes it to NuGet.
Task("Deploy")
    .IsDependentOn("Run-Unit-Tests")
    .WithCriteria(() => AppVeyor.IsRunningOnAppVeyor){
        var nuGetPackSettings = new NuGetPackSettings {
                                        Id                      = "TestNuget",
                                        Version                 = "0.0.0.1",
                                        Title                   = "The tile of the package",
                                        Authors                 = new[] {"John Doe"},
                                        Owners                  = new[] {"Contoso"},
                                        Description             = "The description of the package",
                                        Summary                 = "Excellent summary of what the package does",
                                        ProjectUrl              = new Uri("https://github.com/SomeUser/TestNuget/"),
                                        IconUrl                 = new Uri("http://cdn.rawgit.com/SomeUser/TestNuget/master/icons/testnuget.png"),
                                        LicenseUrl              = new Uri("https://github.com/SomeUser/TestNuget/blob/master/LICENSE.md"),
                                        Copyright               = "Some company 2015",
                                        ReleaseNotes            = new [] {"Bug fixes", "Issue fixes", "Typos"},
                                        Tags                    = new [] {"Cake", "Script", "Build"},
                                        RequireLicenseAcceptance= false,
                                        Symbols                 = false,
                                        NoPackageAnalysis       = true,
                                        Files                   = new [] { new NuSpecContent {Source = "bin/TestNuget.dll", Target = "bin"},                                                                       },
                                        BasePath                = "./src/TestNuget/bin/release",
                                        OutputDirectory         = "./nuget"
                                 };

        NuGetPack("./nuspec/TestNuget.nuspec", nuGetPackSettings);

        // Get the path to the package.
        var package = "./nuget/SlackPRTGCommander.0.0.1.nupkg";

        // Push the package.
        NuGetPush(package, new NuGetPushSettings {
            Source = "http://example.com/nugetfeed",
            ApiKey = "4003d786-cc37-4004-bfdf-c4f3e8ef9b3a"
        });
});
I hope you found this useful and thanks for reading,
Jamie
If you enjoy the content, then consider buying me a coffee.