Exploring Kubernetes With MicroK8s
I am kicking off a new series of posts revolving around exploring Kubernetes by using MicroK8s. MicroK8s is a certified Kubernetes distribution by Canonical, the creators of Ubuntu that provides a single package for installing a complete Kubernetes environment with an easy use set of commands for adding standard packages.
You can run MicroK8s on Linux, Windows, or macOS, and there are instructions for doing so on the site. I am going to keep this simple and assume you are using one of the following.
- A virtual machine running Ubuntu 18.04+
- A workstation running Ubuntu 18.04+
Once you have that installed, it is a single command away:
$ sudo snap install microk8s --classic
Now, all we need to do is check the status to wait for it to be ready:
$ microk8s.status
microk8s is running
addons:
# More here
That’s it, we now have a single-node Kubernetes cluster. So feel free to do a basic system check by executing some kubectl commands. You will need to prefix with microk8s unless you declare an alias, which we will cover in the next post.
List nodes
$ microk8s.kubectl get nodes
NAME          STATUS   ROLES    AGE   VERSION
mighty-nuc2   Ready    <none>   14d   v1.16.3
List services
$ microk8s.kubectl get services
NAME             TYPE        CLUSTER-IP      EXTERNAL-IP   PORT(S)        AGE
kubernetes       ClusterIP   10.152.183.1    <none>        443/TCP        14d
Now let’s enable some services that we would want running on our cluster. We are going to turn on the dashboard, dns, registry, prometheus, and the metrics-server. There will be follow up posts that leverage these.
$ sudo microk8s.enable dns dashboard registry prometheus metrics-server
Now, the final thing we are going to do is visit our dashboard. We have to grab our token before we can log in.
$ token=$(microk8s.kubectl -n kube-system get secret | grep default-token | cut -d " " -f1)
$ microk8s.kubectl -n kube-system describe secret $token
Copy the token from the output of that last command. Now we need to find out what our address is for the dashboard by running the following command:
$ microk8s.kubectl get services -n kube-system -l k8s-app=kubernetes-dashboard
NAME                   TYPE        CLUSTER-IP     EXTERNAL-IP   PORT(S)   AGE
kubernetes-dashboard   ClusterIP   10.152.183.5   <none>        443/TCP   14d
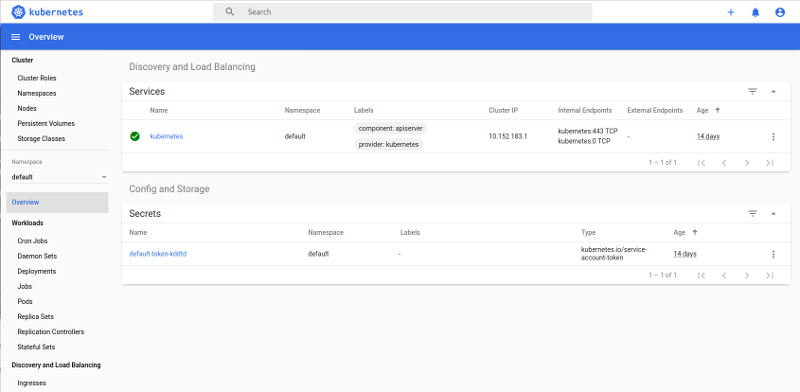
So now, we need to visit the IP address listed above. For me, it would be https://10.152.183.5:443, accept the self-signed certificate warning. You will see a login page, select the token option, and past the token we copied from the command above. You should now see something similar to this:
Wrapping Up
At this point, you know have a local Kubernetes cluster running that you can use for exploration. I hope you found this useful, and in future posts, we will take this cluster and start exploring more exciting scenarios.
Thanks for reading,
Jamie
If you enjoy the content, then consider buying me a coffee.