Deploying Dash to Google App Engine
Deploying Dash to Google App Engine
This post is the third post concerning Dash and rounds out the exercise of deploying a Dash app to three of the major cloud vendors. My previous posts on Azure and AWS seem to have added a lot of value so doing one on Google App Engine just seemed like the natural progression. Let’s get started.
Step 1: Create Dash Virtual Environment
As with any Python project, let’s create a virtual environment for our dash app. This tutorial will assume you are working on Ubuntu.
$ cd ~
$ python3 -m venv .venvs/dash
Now let us activate this virtual environment before we continue.
$ source .venvs/dash/bin/activate
Step 2: Setup the project folder
Now let’s create a folder and the initial files that we will need.
$ mkdir dash-gcp && cd .
Now let’s make the two files that are necessary to get an essential Dash app up and running.
$ touch app.yaml
$ touch main.py
We call our Python file main because the default behavior of Google App Engine is to assume that your entrypoint is located in a file named main.py. To learn more about the convention over configuration read the Application Startup section here. That is it! We will only need these two files to get it working.
Step 3: Install Dash packages and freeze
Now we need to install our dependencies.
$ pip install dash==0.36.0
$ pip install dash-html-components==0.13.5
$ pip install dash-core-components==0.43.0
$ pip install dash-table==3.1.11
$ pip install dash-daq==0.1.0
Now that those are installed let’s create our requirements.txt file.
$ pip freeze > requirements.txt
Special Note
If you are running pip freeze on Ubuntu, your requirements.txt may end up with a package that will cause errors. Please search for pkg-resources==0.0.0 and remove it from your requirements.txt.
Step 4: Build your Dash app
Now I am not going to be original here, and we are going to use the example application found in the Dash tutorial, with some slight modifications to the message.
Open your main.py and add the following.
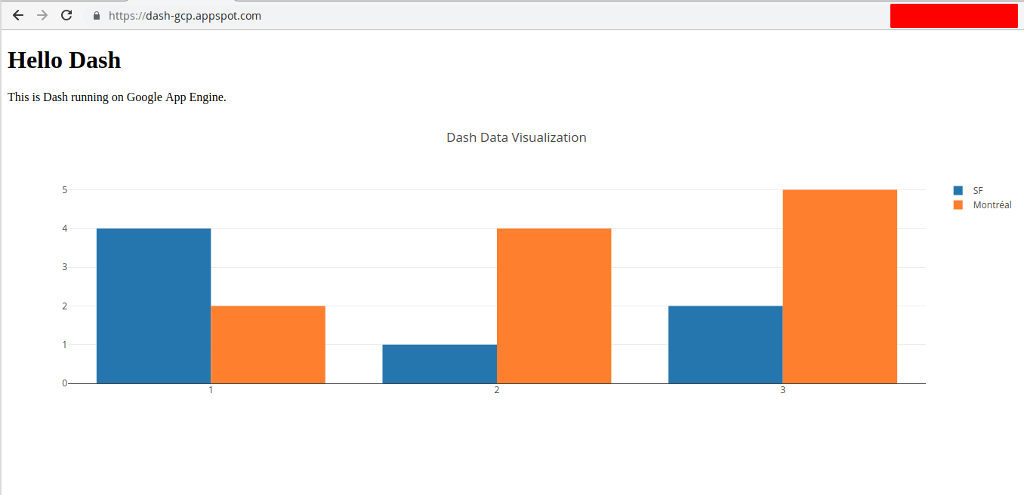
import dash
import dash_core_components as dcc
import dash_html_components as html

dash_app = dash.Dash()
app = dash_app.server

dash_app.layout = html.Div(children=[
    html.H1(children='Hello Dash'),

    html.Div(children='''
        This is Dash running on Google App Engine.
    '''),

    dcc.Graph(
        id='example-graph',
        figure={
            'data': [
                {'x': [1, 2, 3], 'y': [4, 1, 2], 'type': 'bar', 'name': 'SF'},
                {'x': [1, 2, 3], 'y': [2, 4, 5], 'type': 'bar', 'name': u'Montréal'},
            ],
            'layout': {
                'title': 'Dash Data Visualization'
            }
        }
    )
])

if __name__ == '__main__':
    dash_app.run_server(debug=True)
Save your changes and let’s run it and see what we built. Run using the following command.
$ python main.py
Navigate to http://localhost:8050, and you should see your Dash App.
Step 5: Configure your app.yaml
Let’s open the app.yaml in your favorite text editor and add the following.
runtime: python37
That’s it since we are relying on the conventions. Now we are ready to deploy start our deploy to Google App Engine.
Step 6: Publishing to Google App Engine
Now I assume you have the Google Cloud SDK tools installed. If you don’t, follow the instructions for your OS located here.
Let’s deploy our dash app and answer the questions based on your specific needs.
$ gcloud app deploy
You are creating an app for project [dash-gcp].
WARNING: Creating an App Engine application for a project is irreversible and the region
cannot be changed. More information about regions is at
<https://cloud.google.com/appengine/docs/locations>.

Please choose the region where you want your App Engine application located:

 [1] asia-east2    (supports standard and flexible)
 [2] asia-northeast1 (supports standard and flexible)
 [3] asia-south1   (supports standard and flexible)
 [4] australia-southeast1 (supports standard and flexible)
 [5] europe-west   (supports standard and flexible)
 [6] europe-west2  (supports standard and flexible)
 [7] europe-west3  (supports standard and flexible)
 [8] northamerica-northeast1 (supports standard and flexible)
 [9] southamerica-east1 (supports standard and flexible)
 [10] us-central    (supports standard and flexible)
 [11] us-east1      (supports standard and flexible)
 [12] us-east4      (supports standard and flexible)
 [13] us-west2      (supports standard and flexible)
 [14] cancel
Please enter your numeric choice:  11

Creating App Engine application in project [dash-gcp] and region [us-east1]....done.

Services to deploy:

descriptor:      [~/code/dash-gcp/app.yaml]
source:          [~/code/dash-gcp]
target project:  [dash-gcp]
target service:  [default]
target version:  [20190223t141951]
target url:      [https://dash-gcp.appspot.com]


Do you want to continue (Y/n)?


Beginning deployment of service [default]...
Created .gcloudignore file. See `gcloud topic gcloudignore` for details.
╔════════════════════════════════════════════════════════════╗
╠═ Uploading 3 files to Google Cloud Storage                ═╣
╚════════════════════════════════════════════════════════════╝
File upload done.
Updating service [default]...failed.

ERROR: (gcloud.app.deploy) Error Response: [7] Access Not Configured. Cloud Build has not been used in project dash-gcp before or it is disabled. Enable it by visiting https://console.developers.google.com/apis/api/cloudbuild.googleapis.com/overview?project=dash-gcp then retry. If you enabled this API recently, wait a few minutes for the action to propagate to our systems and retry.
Oh no, we got an error. If you see the error, follow the link above, and you will be taken directly to the screen to enable the setting. You get up to 120 build minutes daily for free if using the n1-standard-1 machine type, so you don’t have to worry about the cost.
Now let’s rerun our command.
$ gcloud app deploy
Services to deploy:

descriptor:      [~/code/dash-gcp/app.yaml]
source:          [~/code/dash-gcp]
target project:  [dash-gcp]
target service:  [default]
target version:  [20190223t142211]
target url:      [https://dash-gcp.appspot.com]


Do you want to continue (Y/n)?  Y

Beginning deployment of service [default]...
╔════════════════════════════════════════════════════════════╗
╠═ Uploading 0 files to Google Cloud Storage                ═╣
╚════════════════════════════════════════════════════════════╝
File upload done.
Updating service [default]...done.

Setting traffic split for service [default]...done.

Deployed service [default] to [https://dash-gcp.appspot.com]

You can stream logs from the command line by running:
  $ gcloud app logs tail -s default

To view your application in the web browser run:
  $ gcloud app browse
Hopefully, at this point, you have a successful deployment, now we can run the command to browse our app and see it running in GCP.
$ gcloud app browse
Guide Completed
I hope you found this helpful and informative. This is a basic example, and there is a lot of customization that can be configured with the app.yaml. As always, don’t hesitate to reach out to me on social media or Github.
Thanks for reading,
Jamie
If you enjoy the content, then consider buying me a coffee.