Deploying Dash to Azure without using Docker
Deploying Dash to Azure without using Docker
This post is the fourth post concerning Dash and the second post about deploying to Azure App Service. My previous Azure post has been popular, and I thought I was doing a disservice to Azure by using a container to deploy a Python application. Let’s get started by building our example application which, if you have read the other posts, will look super familiar.
Step 1: Create Dash Virtual Environment
As with any Python project, let’s create a virtual environment for our dash app. This tutorial will assume you are working on Ubuntu.
$ cd ~
$ python3 -m venv .venvs/dash
Now let us activate this virtual environment before we continue.
$ source .venvs/dash/bin/activate
Step 2: Setup the project folder
Now let’s create a folder and the initial files that we will need.
$ mkdir dash-az && cd .
Now let’s make the single file that is necessary to get a basic Dash app up and running.
$ touch application.py
That is it! We will only need these two files to get it working.
Step 3: Install Dash packages and freeze
Now we need to install our dependencies.
$ pip install dash==0.36.0
$ pip install dash-html-components==0.13.5
$ pip install dash-core-components==0.43.0
$ pip install dash-table==3.1.11
$ pip install dash-daq==0.1.0
Now that those are installed let’s create our requirements.txt file.
$ pip freeze > requirements.txt
Special Note
If you are running pip freeze on Ubuntu, your requirements.txt may end up with a package that will cause errors. Please search for pkg-resources==0.0.0 and remove it from your requirements.txt.
Step 4: Build your Dash app
Now I am not going to be original here, and we are going to use the example application found in the Dash tutorial, with some slight modifications to the message.
Open your applicaton.py and add the following. You will notice this looks a tad different than the previous Azure configuration. That is because Azure is looking for a Flask app named app which it automagically wires up to gunicorn. You can read more here.
import dash
import dash_core_components as dcc
import dash_html_components as html
dash_app = dash.Dash()
app = dash_app.server
dash_app.layout = html.Div(children=[
html.H1(children='Hello Dash'),
html.Div(children='''
This is Dash running on Azure App Service without a Docker container.
'''),
dcc.Graph(
id='example-graph',
figure={
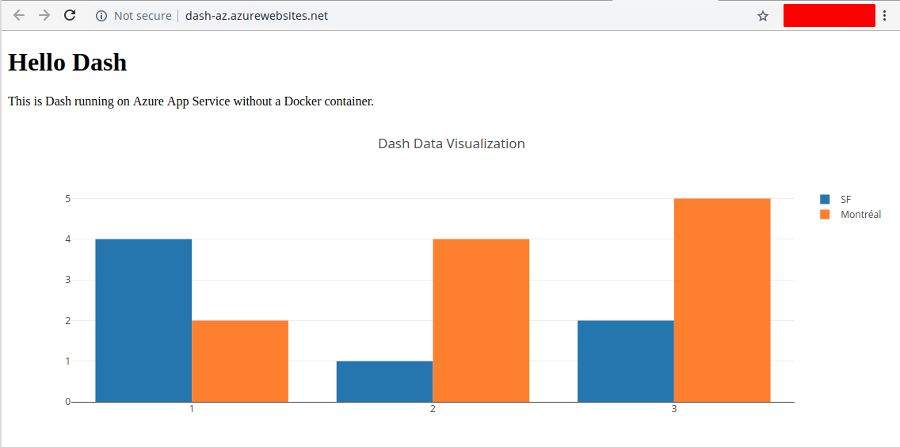
'data': [
{'x': [1, 2, 3], 'y': [4, 1, 2], 'type': 'bar', 'name': 'SF'},
{'x': [1, 2, 3], 'y': [2, 4, 5], 'type': 'bar', 'name': u'Montréal'},
],
'layout': {
'title': 'Dash Data Visualization'
}
}
)
])
if __name__ == '__main__':
dash_app.run_server(debug=True)
Save your changes and let’s run it and see what we built. Run using the following command.
$ python application.py
Navigate to http://localhost:8050, and you should see your Dash App.
Step 5: Publishing to Azure App Service
Now I assume you have the Azure CLI installed. If you don’t, follow the instructions for your OS located here.
Let’s deploy our dash app using the Azure CLI. First, we need to login to Azure.
$ az login
Now from the root of your application directory type the command below. This will create a resource group, app service plan, app service, and zip deploy your application.
$ az webapp up -n dash-az
Creating Resource group 'appsvc_rg_Linux_centralus' ...
Resource group creation complete
Creating App service plan 'appsvc_asp_Linux_centralus' ...
App service plan creation complete
Creating app 'dash-az' ....
Webapp creation complete
Updating app settings to enable build after deployment
Creating zip with contents of dir ~/code/dash-az ...
Preparing to deploy and build contents to app.This operation can take a while to complete ...
All done.
{
  "app_url": "http://dash-az.azurewebsites.net",
  "location": "Central US",
  "name": "dash-az",
  "os": "Linux",
  "resourcegroup": "appsvc_rg_Linux_centralus",
  "serverfarm": "appsvc_asp_Linux_centralus",
  "sku": "PREMIUMV2",
  "src_path": "~/code/dash-az",
  "version_detected": "-",
  "version_to_create": "python|3.7"
}
Now we need to navigate to the URL above to see our app running.
Guide Completed
I hope you found this helpful and informative. As always, don’t hesitate to reach out to me on social media or Github.
Thanks for reading,
Jamie
If you enjoy the content, then consider buying me a coffee.