Deploying Dash to Azure App Service
Deploying Dash to Azure App Service
Before I get started on how to deploy a Dash app to Azure App Service, I am going cover Dash. Dash is a Python framework for building dashboards using Plotly for building your charts and graphs. Dash also uses Flask and React.
Since Dash is based on Flask, we can use the standard Python Docker container and any Flask tutorial for Docker as a reference. That is one advantage that I will give to Azure is that it just uses standard container images.
Step 1: Create Dash Virtual Environment
As with any Python project, let’s create a virtual environment for our dash app. This tutorial will assume you are working on Ubuntu.
$ cd ~
$ python3 -m venv .venvs/dash
Now let us activate this virtual environment before we continue.
$ source .venvs/dash/bin/activate
Step 2: Setup the project folder
Now let’s create a folder and the initial files that we will need.
$ mkdir dash-azure && cd .
Now let’s make the two files that are necessary to get a basic Dash app up and running.
$ touch application.py
$ touch Dockerfile
That is it! We will only need these two files to get it working.
Step 3: Install Dash packages and freeze
Now we just need to install our dependencies.
pip install dash==0.30.0
pip install dash-html-components==0.13.2
pip install dash-core-components==0.38.0
pip install dash-table==3.1.7
Now that those are installed, let’s create our requirements.txt file.
$ pip freeze > requirements.txt
Special Note
If you are running pip freeze on Ubuntu, your requirements.txt may end up with a package that will cause errors. Please search for pkg-resources==0.0.0 and remove it from your requirements.txt.
Step 4: Build your Dash app
Now I am not going to be original here and we are going to use the example application found in the Dash tutorial, with some slight modifications that I will explain. You need to specifically use port 80 as that is the default used when Azure sets the port option. If you don’t want to use that port, you will need to do a custom run file.
Open your application.py and add the following:
import dash
import dash_core_components as dcc
import dash_html_components as html

app = dash.Dash()
application = app.server

app.layout = html.Div(children=[
    html.H1(children='Hello Dash'),

    html.Div(children='''
        This is Dash running on Azure App Service.
    '''),

    dcc.Graph(
        id='example-graph',
        figure={
            'data': [
                {'x': [1, 2, 3], 'y': [4, 1, 2], 'type': 'bar', 'name': 'SF'},
                {'x': [1, 2, 3], 'y': [2, 4, 5], 'type': 'bar', 'name': u'Montréal'},
            ],
            'layout': {
                'title': 'Dash Data Visualization'
            }
        }
    )
])

if __name__ == '__main__':
    application.run(debug=True, host='0.0.0.0', port='80')
Save your changes and let’s run it and see what we built. Run using the following command.
$ python application.py
Navigate to http://localhost:80 and you should see the following.

Step 6: The Dockerfile
Let’s open the Dockferfile in your favorite text editor and add the following.
FROM python:3.6-alpine

RUN mkdir /app
WORKDIR /app
ADD requirements.txt /app/
RUN pip install -r requirements.txt
ADD . /app/

ENTRYPOINT [ "python" ]
CMD ["application.py"]
Let’s be sure that it works by building the docker image and running it.
$ docker build -t dash-azure .
Now let’s run it.
$ docker run -it --rm -p 7625:80 dash-azure
Navigate to http://localhost:7625/ and you should see this page again.
Now we are ready to deploy start our deploy to Azure App Service.
Step 7: Publishing to Docker Hub
The first step is to publish it to Docker Hub so we can pull it down in Azure. So let’s login into Docker Hub.
$ docker login
Let’s tag our image first:
$ docker tag dash-azure <username>/dash-azure:1.0.0
Now we can do a docker push:
$ docker push <username>/dash-azure:1.0.0
The push refers to repository [docker.io/<username>/dash-azure]
55e7e3649e1e: Pushed
dc09438f9535: Pushed
4a11766e4f4a: Pushed
a1174720216f: Pushed
27951393f8e7: Pushed
f89067d6e30e: Pushed
5129f19da2c9: Pushed
34929ec591c4: Pushed
e02b32b1ff99: Pushed
f75e64f96dbc: Pushed
8f7ee6d76fd9: Pushed
c23711a84ad4: Pushed
90d1009ce6fe: Pushed
1.0.0: digest: sha256:756a6b41508458dfcea0f7dd3d755bba507e7ab7062e380f648924ad932f6a69 size: 3057
Step 7: Manually Deploying to Azure App Service
Now we could do this all on the command line, the Microsoft documenation covers that pretty well. I am just going to do that in the portal since that is what most people are going to be familiar with using.
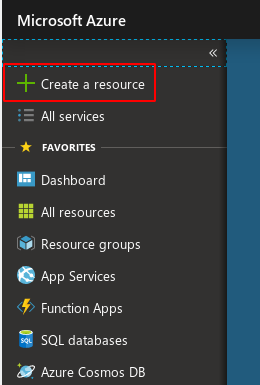
Let’s go to portal.azure.com. Once signed in, we are going to create a new Azure App Service.
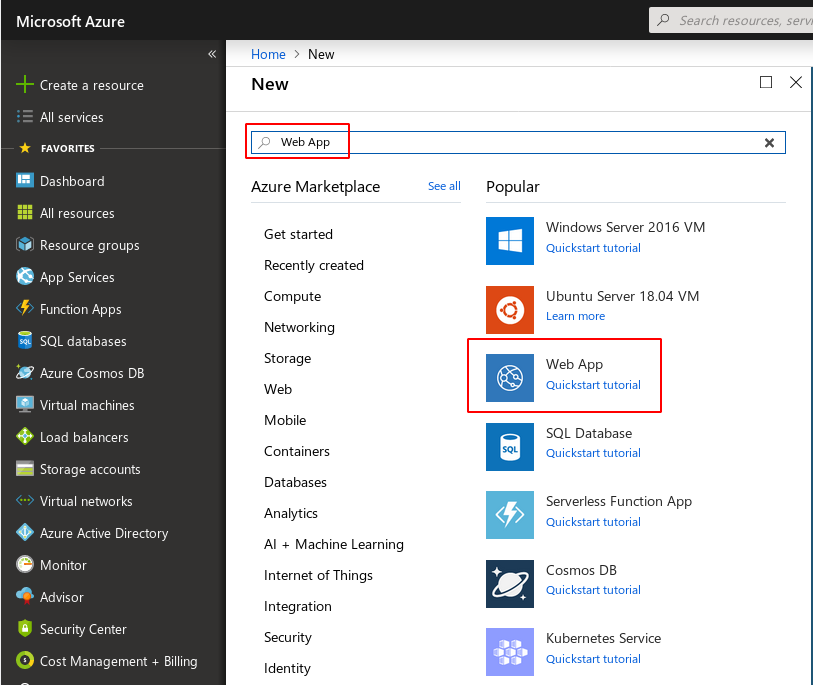
Now search for Web App, then click on the Web App tile that appears.
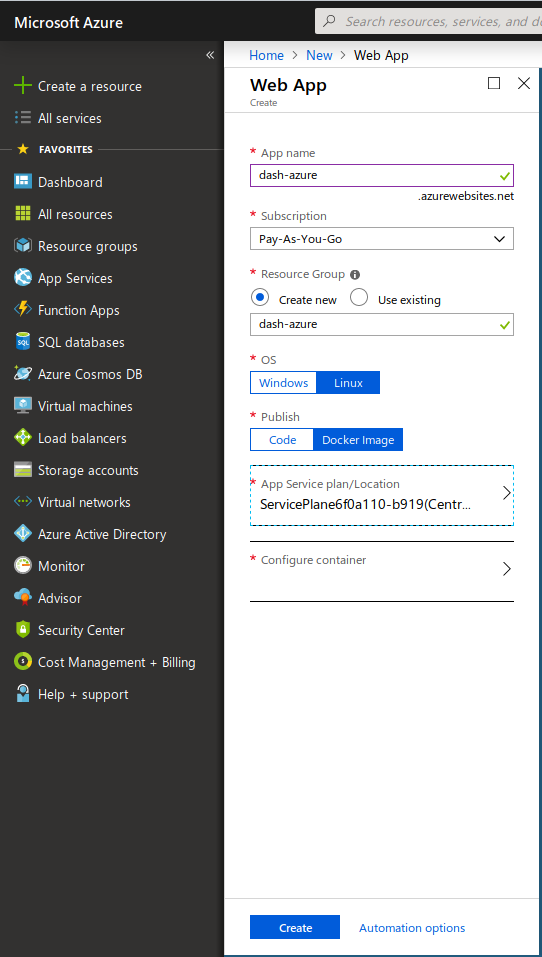
Now create the App service using the settings below.
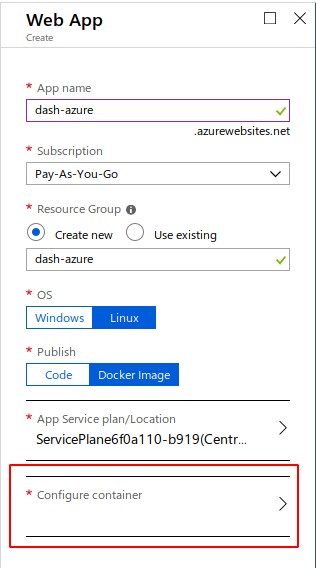
Once those settings are completed, we are going to click on the Configure Container section.
Now on the next blade, that is what Azure calls it, we will select *Single Container, Docker Hub, and put in the image name along with the tag of what we pushed.
Here is what it looks like completed.
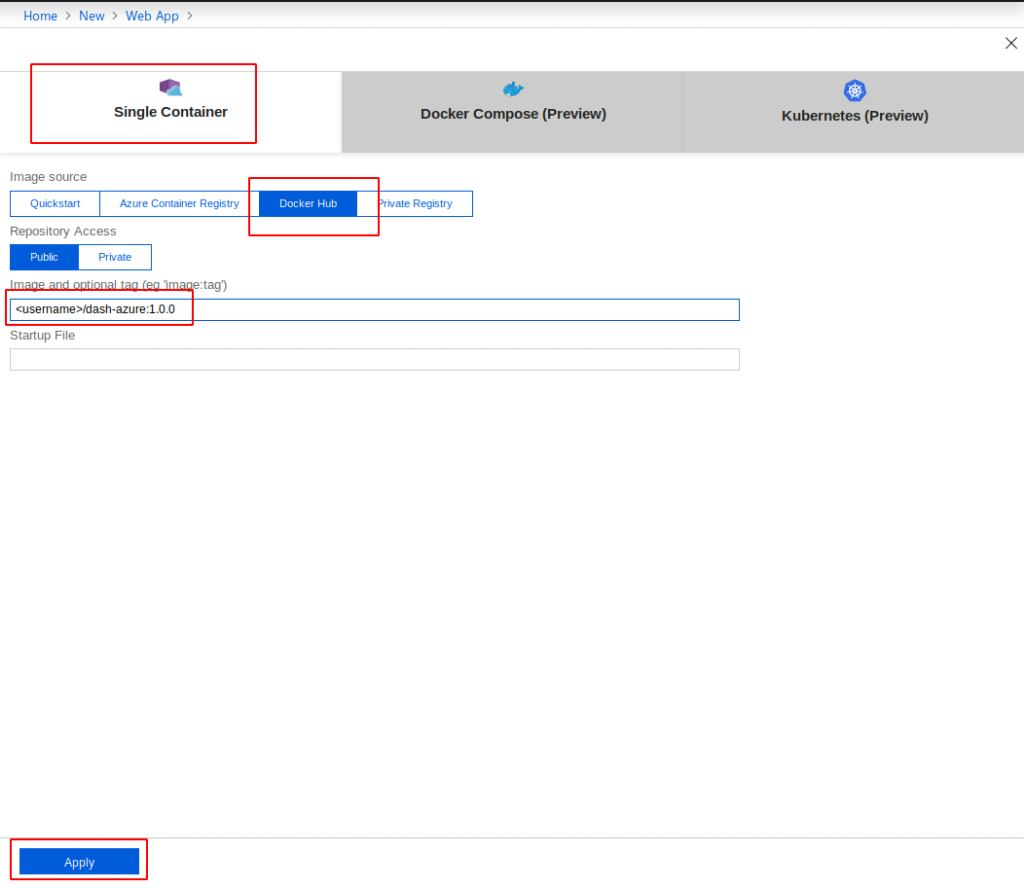
Now click on Apply and you should see the following screen.
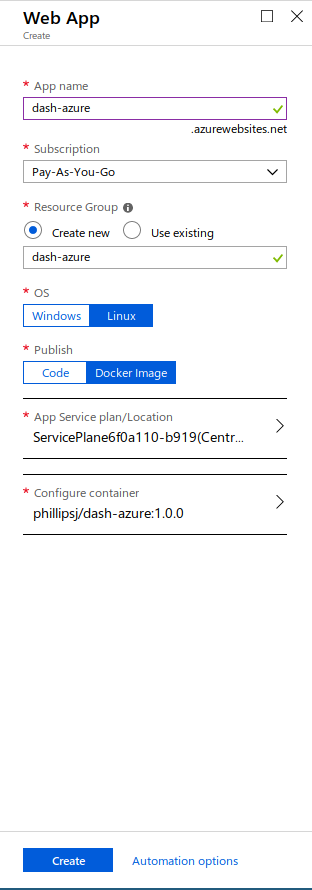
Now, all we need to do is click Create at the bottom of the screen below. Azure will validate your selections, then start the deployment. You should see a deployment notification on the right-hand side of your screen. Once you get the notification that it is complete we can navigate and see if it works.
As before, we already know the URL that was created, in this example it was http://dash-azure.azurewebsites.net.

Guide Completed
Well if you made it this far, thank you for sticking around and reading. I hope you found this helpful and informative. This is a basic example and there is more functionality that can be enabled with containers and Azure App Services that are in the tutorial above. I hope to have more Azure content over the next few weeks. As always, don’t hesitate to reach out to me on social media or Github.
If you enjoy the content, then consider buying me a coffee.