Applying Azure App Service extensions with ARM
Applying Azure App Service extensions with ARM
Running ASP .NET Core on Azure App Service is an exciting undertaking. By default as of this blog post is .NET Core 2.1. You can use extensions to upgrade to ASP .NET Core 2.2 or use the extension to achieve better Azure integration for your ASP .NET Core apps. These extensions are easy enough to apply from the portal, however, since I believe in infrastructure as code, let’s get down to business.
Here is the ARM template that we will create at the end.
{
   "$schema": "https://schema.management.azure.com/schemas/2015-01-01/deploymentTemplate.json#",
   "contentVersion": "1.0.0.0",
   "parameters": {
       "siteName": {
           "type": "string",
           "metadata": {
               "description": "The Azure App Service Name"
           }
       },
       "extensionName": {
           "type": "string",
           "metadata": {
               "description": "The Site Extension Name."
           }
       },
       "extensionVersion": {
           "type": "string",
           "metadata": {
               "description": "The Extension Version"
           }
       }
   },
   "resources": [
       {
           "type": "Microsoft.Web/sites/siteextensions",
           "name": "[concat(parameters('siteName'), '/', parameters('extensionName'))]",
           "apiVersion": "2015-04-01",
           "location": "[resourceGroup().location]",
           "properties": {
               "version": "[parameters('extensionVersion')]"
           }
       }
   ]
}
How I made this ARM template
My default go to for all IaC is using Terraform. Again, at the time of writing, Terraform doesn’t have support for App Service extensions so we will have to rely on creating an ARM template that we then execute from Terraform. Extensions are available from the REST API which means we can create an ARM template to manipulate them.
The first step will be to create us an App Service that we will use to learn how to create our ARM template. Let’s get started.
Create your main.tf file:
$ touch main.tf
Now let’s add our provider
provider "azurerm" {
  version = "=1.21.0"
}
Now our resource group.
resource "azurerm_resource_group" "main" {
  name     = "extensions"
  location = "East US"
}
Now we need to add our App Service Plan.
resource "azurerm_app_service_plan" "main" {
  name                = "extensions-asp"
  location            = "${azurerm_resource_group.main.location}"
  resource_group_name = "${azurerm_resource_group.main.name}"

  sku {
    tier = "Free"
    size = "F1"
  }
}
Now our App Service, note we have to set it to a 32-bit worker since we are using the free plan.
resource "azurerm_app_service" "main" {
  name                = "extensions-as"
  location            = "${azurerm_resource_group.main.location}"
  resource_group_name = "${azurerm_resource_group.main.name}"
  app_service_plan_id = "${azurerm_app_service_plan.main.id}"
  https_only          = true

  site_config {
    use_32_bit_worker_process = true
  }
}
Now we need to deploy it
$ terraform init
$ terraform plan
$ terraform apply
Adding an extension to an App Service
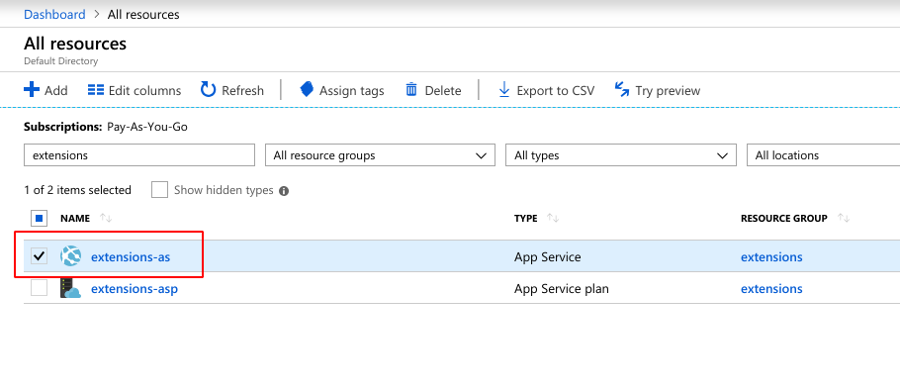
Now let’s add the ASP .NET Core 3.0 extension to the App Service in the portal so we can reverse engineer the information we need to create our ARM template. Open the Azure Portal and navigate to your App Service.
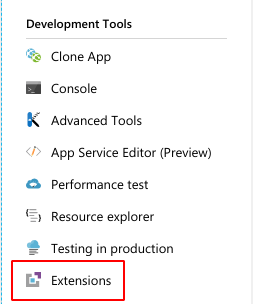
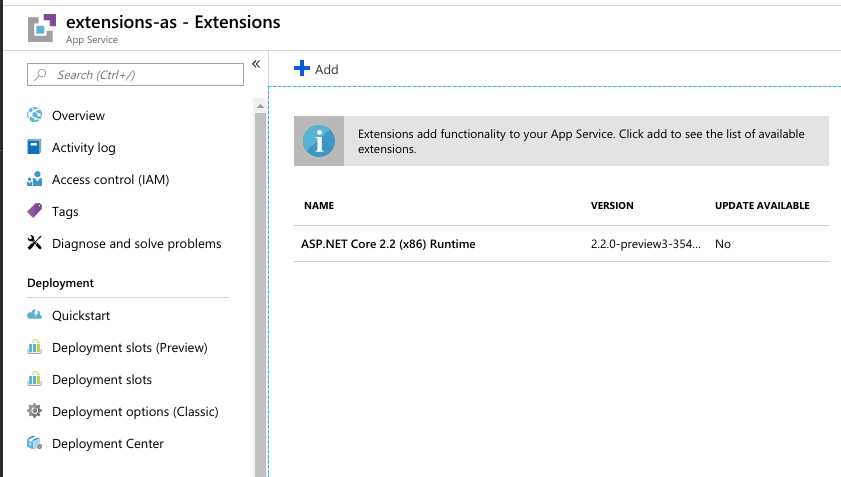
Now on the App Service blade, scroll down until you find the Development Tools section and click on Extensions.
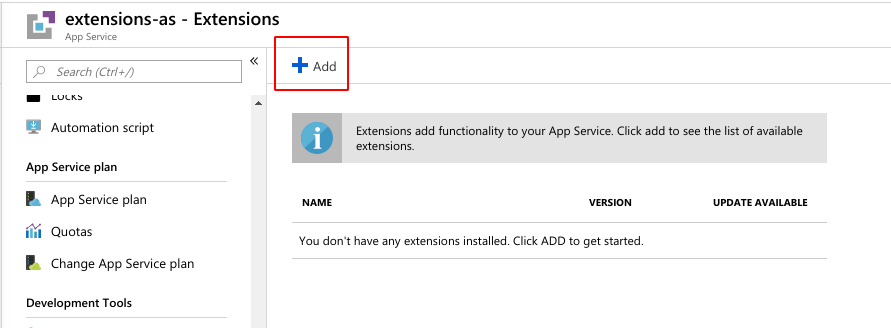
Now we can click on Add which will open the blade to add an extension.
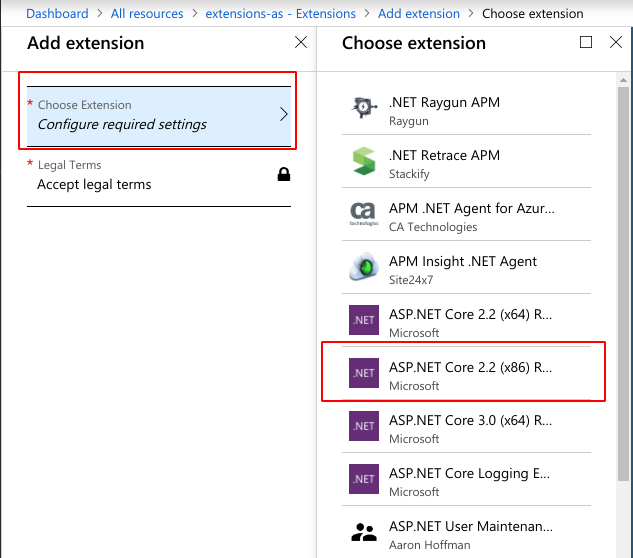
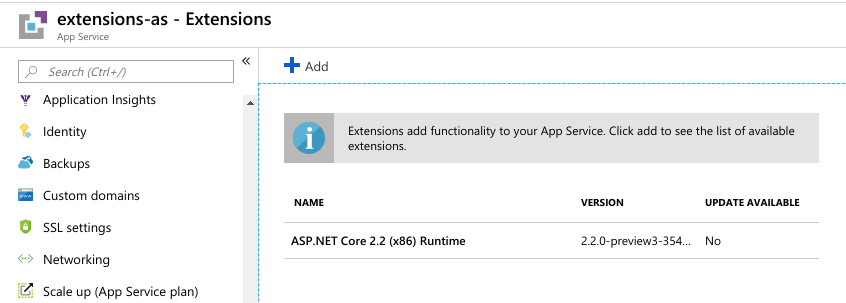
Now on the Add Extension blade, click on Choose Extension and select the ASP .NET Core 2.2 (x86) Runtime.
Now you need to accept the legal terms. Then you can click on Ok. Once the installation finishes, you should see this in your Extensions blade.
Now we can click on that extension a get the Name and Version that we will be using without ARM template.
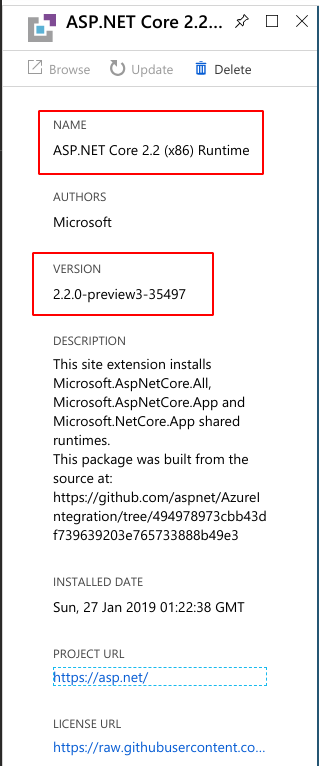
Now we are finished in the Azure Portal, and now we need to build the ARM template.
Building the ARM Template
Azure ARM is painful at the time because the documentation isn’t always up to date or there are weird specific things like this that are not super clear. I have found that the best way to build an ARM template is to use the Azure Resource Explorer to look up the ARM type and other pieces of info that I need.
Here is the Azure Resource Explorer.
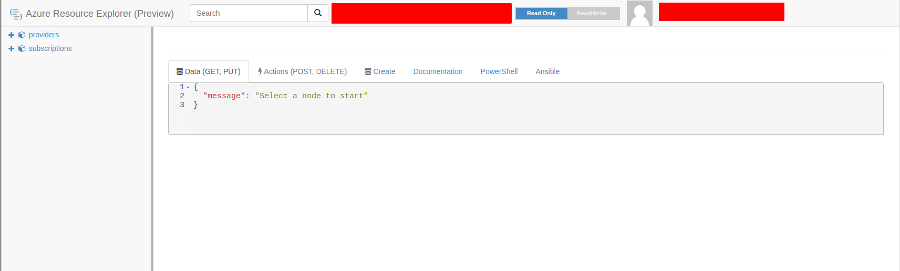
Once on this page, we are going to look up our Azure App Service we created and saw what the type of the extension is and validate that we have the correct name and version.
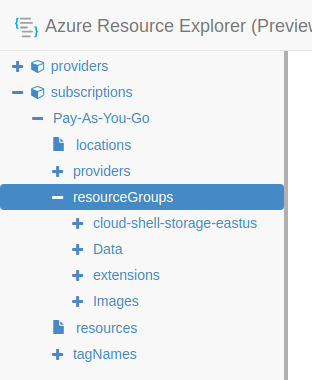
Start by clicking on subscriptions.
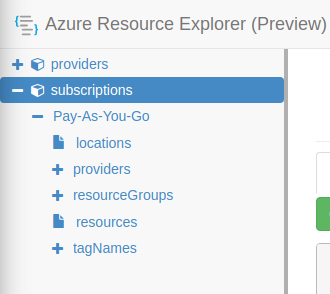
Now click on resourceGroups under the subscription you created the App Service.
Now click on extensions.
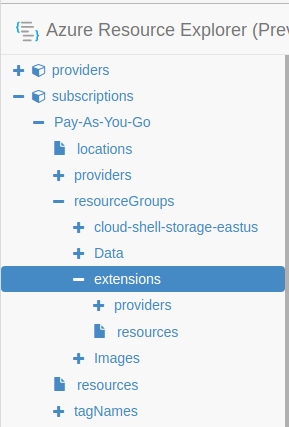
Then click on providers.
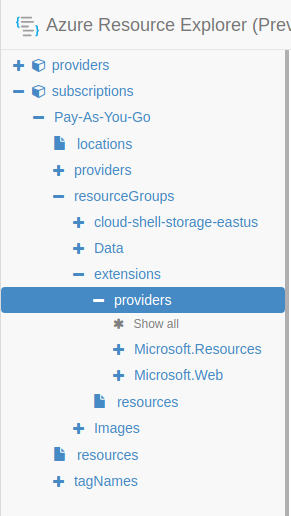
Now Microsoft.Web, then sites.
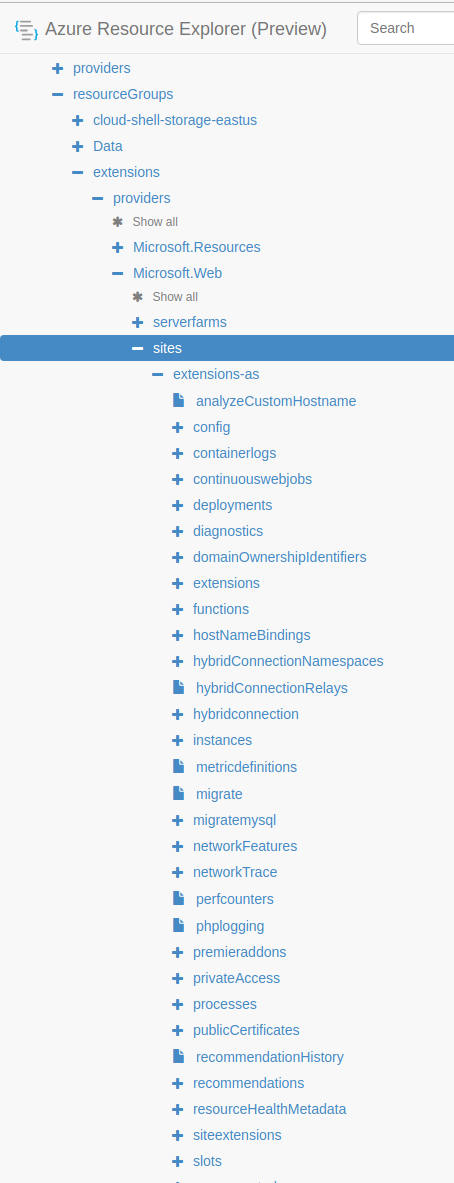
Finally, click on siteextensions.
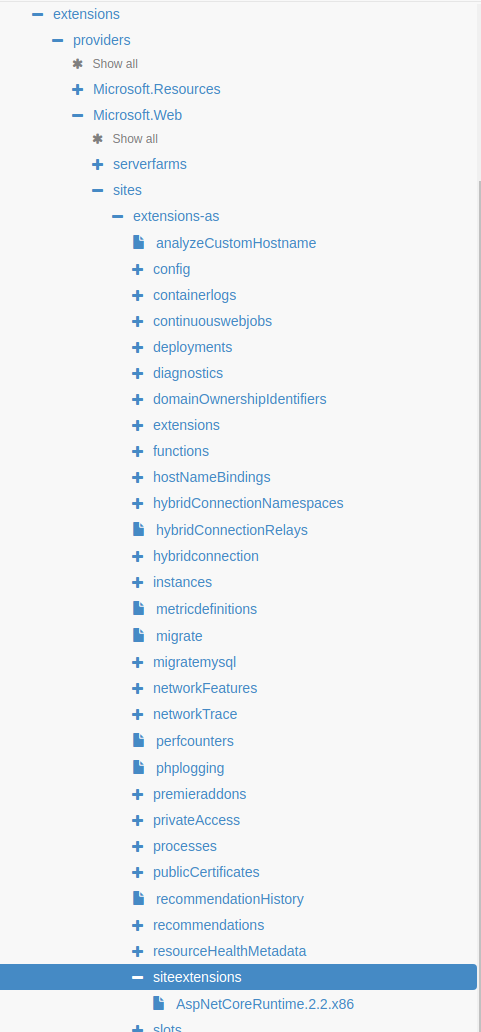
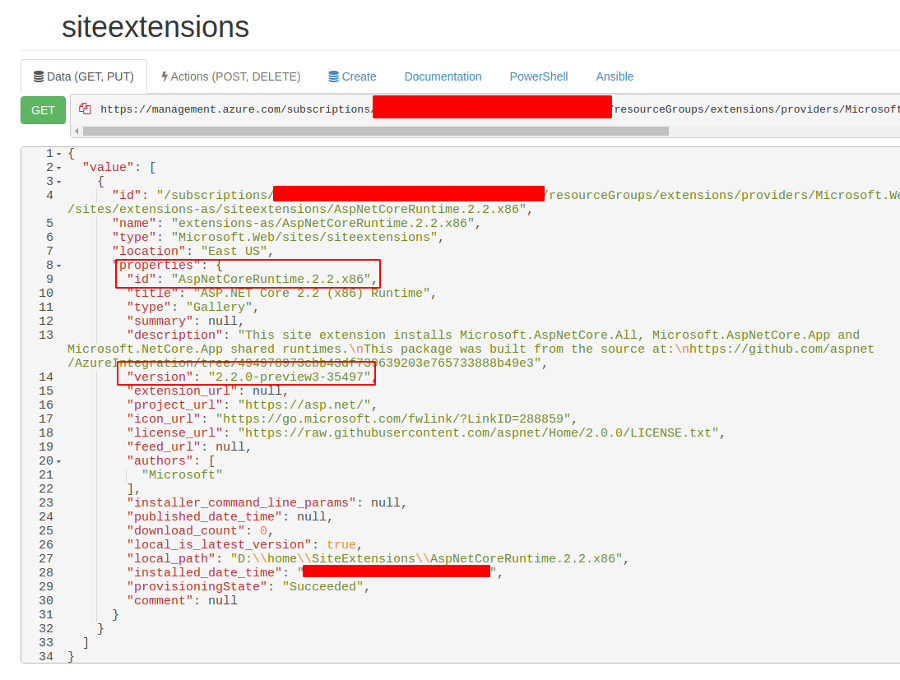
Inspect the JSON that generated for siteextensions. Notice that the ID for the extension isn’t the name in the portal. However, the version is correct. We want to use the ID here in our ARM template.
Now we can construct our ARM template.
ARM Template construction
From the JSON output in the Azure Resource Explorer, we know we want to create a Microsoft.Web/sites/siteextensions resource type. We also know from my Azure ARM Template Tips post that we will need a two-part name. In our case, it will be the sitename followed by a forward slash, then the extension id as showing the output above. We will also need to set the properties to have the version we want to use and the location.
{
    "resources": [
       {
           "type": "Microsoft.Web/sites/siteextensions",
           "name": "extensions-as/AspNetCoreRuntime.2.2.x86",
           "apiVersion": "2015-04-01",
           "location": "East US",
           "properties": {
               "version": "2.2.0-preview3-35497"
           }
       }
   ]
}
Now let’s set this up to be reusable. We are going to create parameters for site name, extension name, and extension version. We will also replace our location with a function.
{
   "$schema": "https://schema.management.azure.com/schemas/2015-01-01/deploymentTemplate.json#",
   "contentVersion": "1.0.0.0",
   "parameters": {
       "siteName": {
           "type": "string",
           "metadata": {
               "description": "The Azure App Service Name"
           }
       },
       "extensionName": {
           "type": "string",
           "metadata": {
               "description": "The Site Extension Name."
           }
       },
       "extensionVersion": {
           "type": "string",
           "metadata": {
               "description": "The Extension Version"
           }
       }
   },
   "resources": [
       {
           "type": "Microsoft.Web/sites/siteextensions",
           "name": "[concat(parameters('siteName'), '/', parameters('extensionName'))]",
           "apiVersion": "2015-04-01",
           "location": "[resourceGroup().location]",
           "properties": {
               "version": "[parameters('extensionVersion')]"
           }
       }
   ]
}
That is it, and we have our ARM template completed. Let’s update our Terraform to use the ARM template and build a new App Service with the extension installed as part of the Terraform apply. We will place the Azure ARM template we created in a folder called ARM in the same directory as main.tf and we will name it siteextensions.json.
Using the ARM Template in Terraform
We are going to add an azurerm_deployment_template to our main.tf.
resource "azurerm_template_deployment" "extension" {
  name                = "extension"
  resource_group_name = "${azurerm_resource_group.main.name}"
  template_body       = "${file("arm/siteextensions.json")}"

  parameters {
    "siteName"          = "${azurerm_app_service.main.name}"
    "extensionName"     = "AspNetCoreRuntime.2.2.x86"
    "extensionVersion"  = "2.2.0-preview3-35497"
  }

  deployment_mode     = "Incremental"
}
Now we have a main.tf that looks like the following.
provider "azurerm" {
  version = "=1.21.0"
}

resource "azurerm_resource_group" "main" {
  name     = "extensions"
  location = "East US"
}

resource "azurerm_app_service_plan" "main" {
  name                = "extensions-asp"
  location            = "${azurerm_resource_group.main.location}"
  resource_group_name = "${azurerm_resource_group.main.name}"

  sku {
    tier = "Free"
    size = "F1"
  }
}

resource "azurerm_app_service" "main" {
  name                = "extensions-as"
  location            = "${azurerm_resource_group.main.location}"
  resource_group_name = "${azurerm_resource_group.main.name}"
  app_service_plan_id = "${azurerm_app_service_plan.main.id}"
  https_only          = true

  site_config {
    use_32_bit_worker_process = true
  }
}

resource "azurerm_template_deployment" "extension" {
  name                = "extension"
  resource_group_name = "${azurerm_resource_group.main.name}"
  template_body       = "${file("arm/siteextensions.json")}"

  parameters {
    "siteName"          = "${azurerm_app_service.main.name}"
    "extensionName"     = "AspNetCoreRuntime.2.2.x86"
    "extensionVersion"  = "2.2.0-preview3-35497"
  }

  deployment_mode     = "Incremental"
}
Make sure you destroy any existing resources first by running terraform destroy command.
Now we can run the following, and you should have an App Service with the site extension installed using Terraform.
$ terraform init
$ terraform plan
$ terraform apply
Here is the extension installed by Terraform.
Conclusion
If you followed along with the whole post, you now know how to use the Azure Resource Explorer to create an ARM template for features that are not yet supported by Terraform.
Thanks for reading,
Jamie
If you enjoy the content then consider buying me a coffee.
If you enjoy the content, then consider buying me a coffee.